Settings
Overview
The Settings section allows Admins (see Roles & Permissions) to configure various aspects of your NEAR Treasury dashboard.
Available actions:
- Approving or Rejecting Pending Requests
- Adding Members
- Editing Members
- Deleting Members
- Setting Vote Thresholds
- Setting Vote Duration
- Theme & Logo
- Preferences
- Reviewing System Updates
Pending Requests
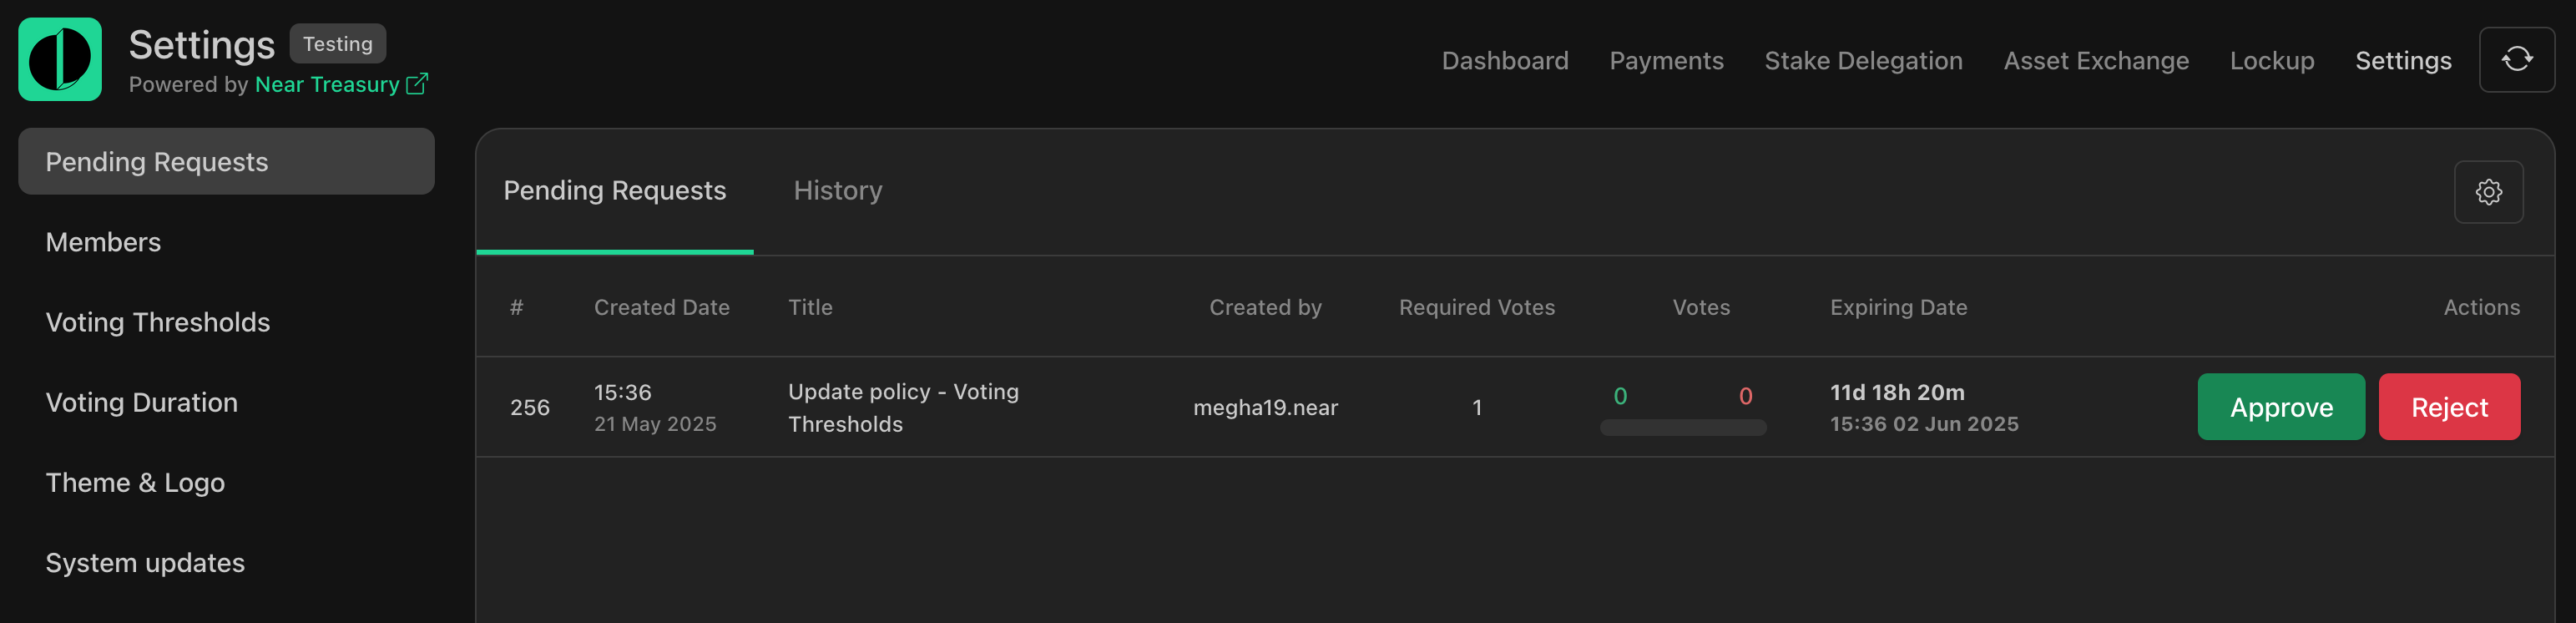
When you first access the Settings section, you'll see a list of pending requests. These are requests to modify the treasury's configuration that are awaiting approval. You can review the details of each request, but only users with the Admin role can vote to approve or reject.
To review and vote on pending requests:
- Navigate to the
Settingssection. - Select the
Pending Requeststab. - View the list of pending requests.
- Review the details of each request.
- Cast your vote to approve or reject the request.

You can sort requests by date by clicking on Created Date. (Ascending or descending order)
Filtering Requests
You can easily filter requests to find specific items.
Proposal Type,Created Date,Status,Created by,Approver,My Vote Status
To filter requests:
Navigate to the
Settingssection.Select the
Pending Requeststab.Click on the
Filtericon.
Select the filter that you want to add.
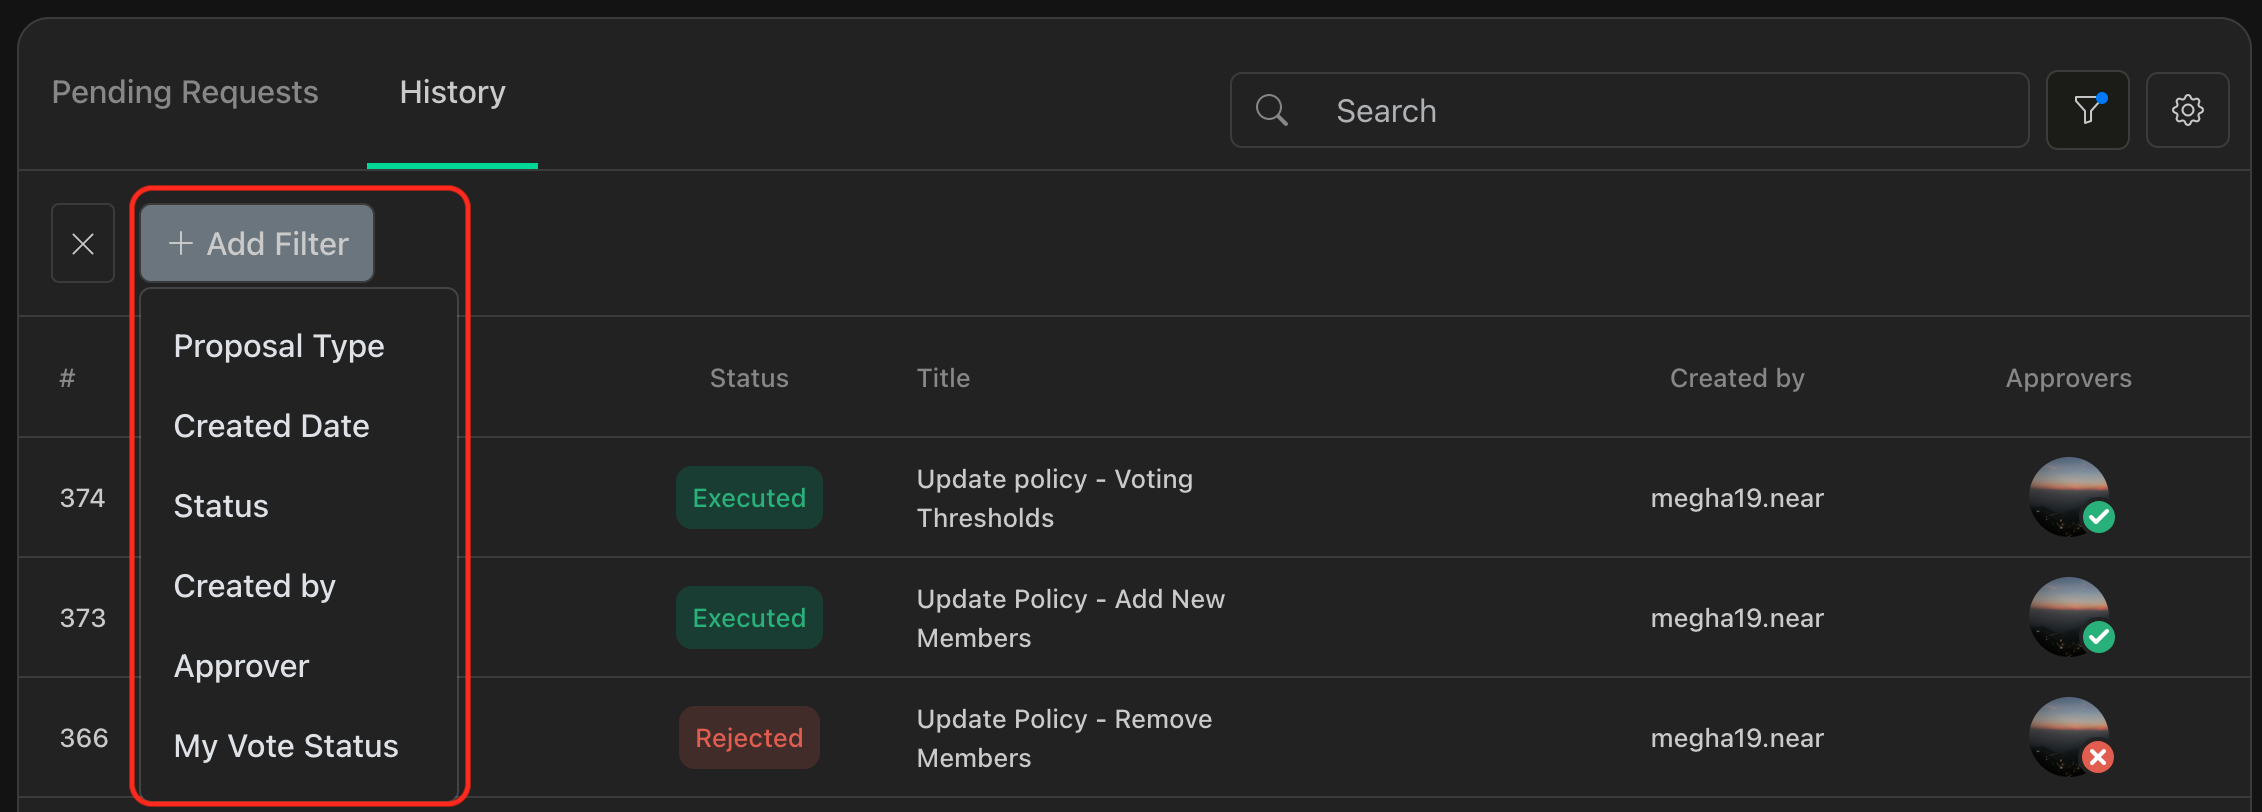
Add filters as needed.

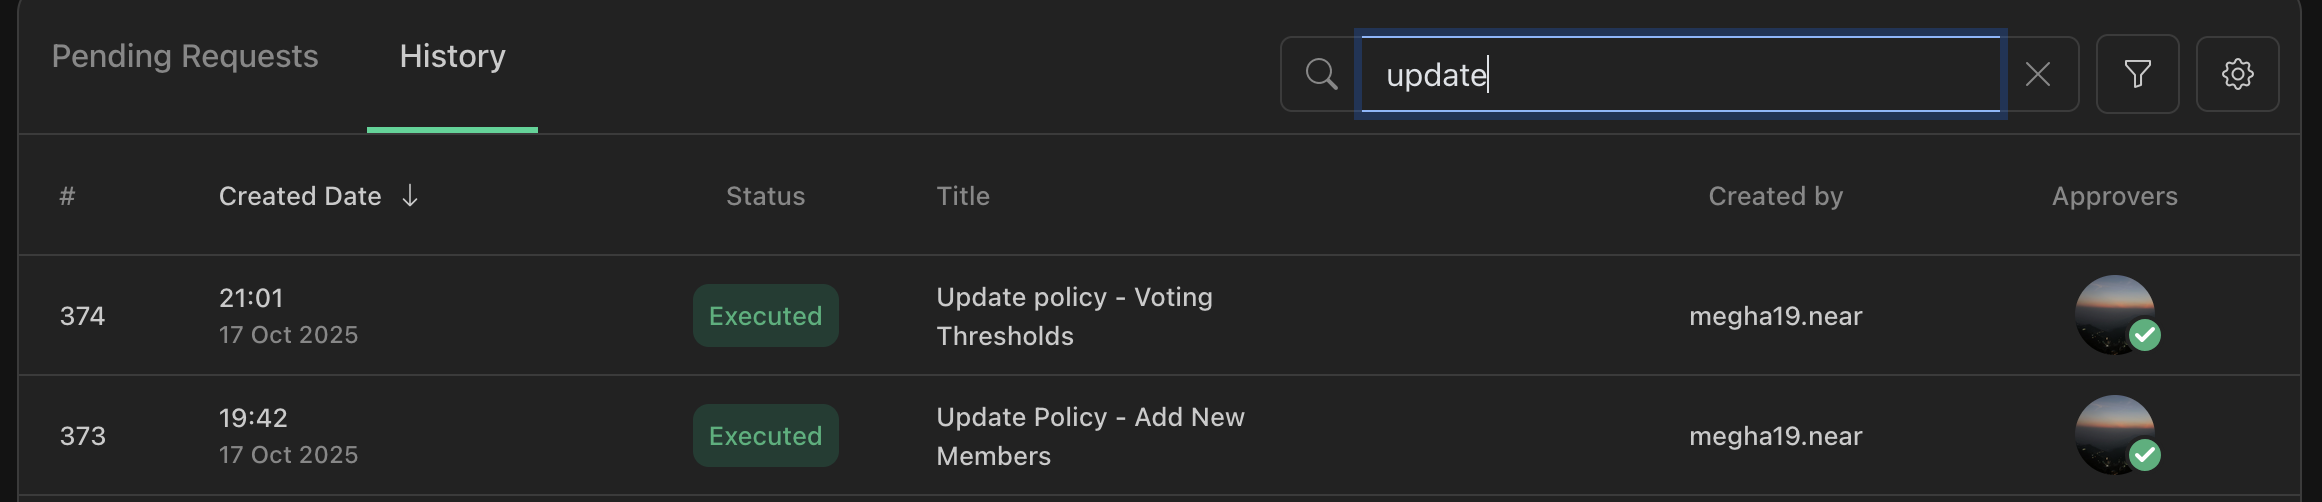
Searching Requests
You can search for keywords on your requests to find specific items.
- Search by
ID,Title,Summary
To search and find requests:
Navigate to the
Settingssection.Select the
Pending Requeststab.Click on the
Searchtext box.
Type the words that you want to search.
Members
This section allows the Admin to manage the members of your treasury. The Admin can create a request to add new members, edit existing members’ roles, or remove members. These requests must be approved by Admins, based on the configured voting threshold. For a detailed explanation of the different roles and permission, refer to the Roles & Permissions page.

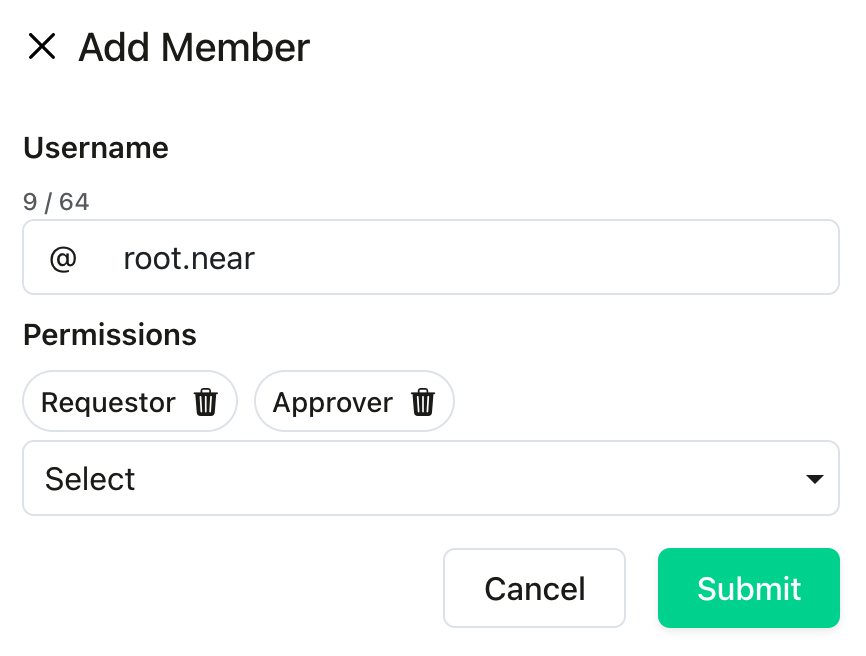
Adding Members
To add members to your treasury:
- Navigate to the
Settingspage. - Select the
Memberstab. - Click the
+ Add Membersbutton. - Enter the NEAR wallet address of the new member.
- Choose the member's role(s):
Requestor,Approver, orAdmin. You can select multiple roles for a member.- See Roles & Permissions for a detailed explanation of each role.
- Click the
Savebutton and confirm the transactions. - Go to the
Requestspage to approve the request.
Editing Members
To edit members from your treasury:
- Navigate to the
Settingspage. - Select the
Memberstab. - Select one or more members by clicking the member's checkbox.
- Click the
Editbutton.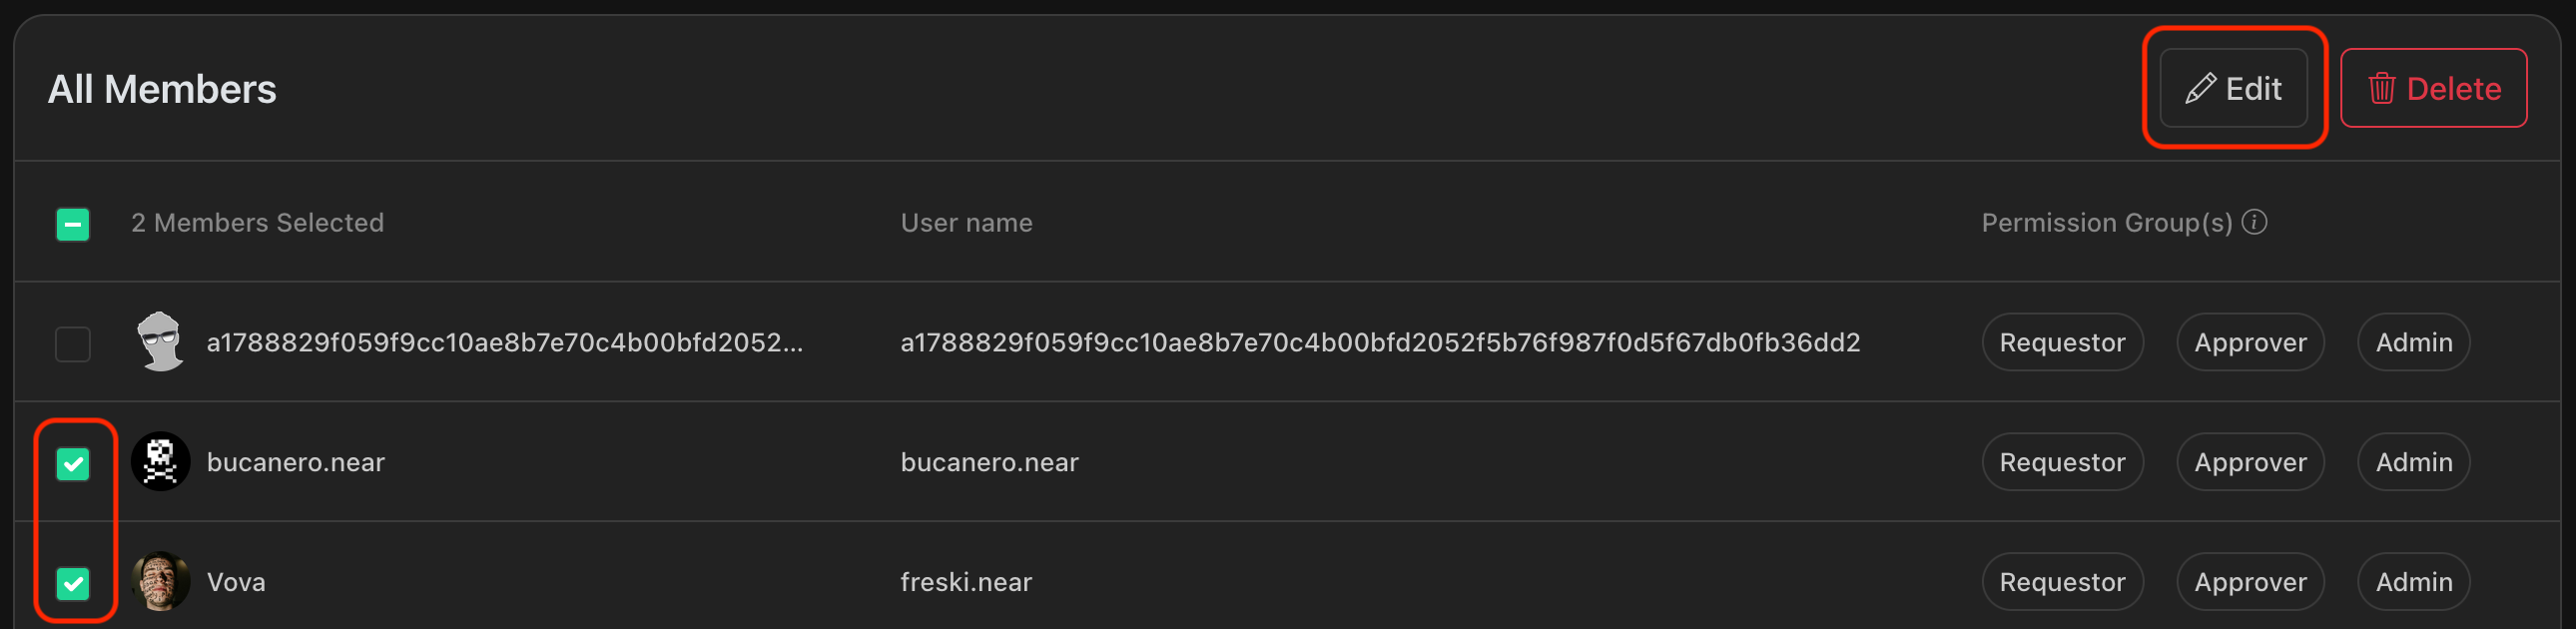
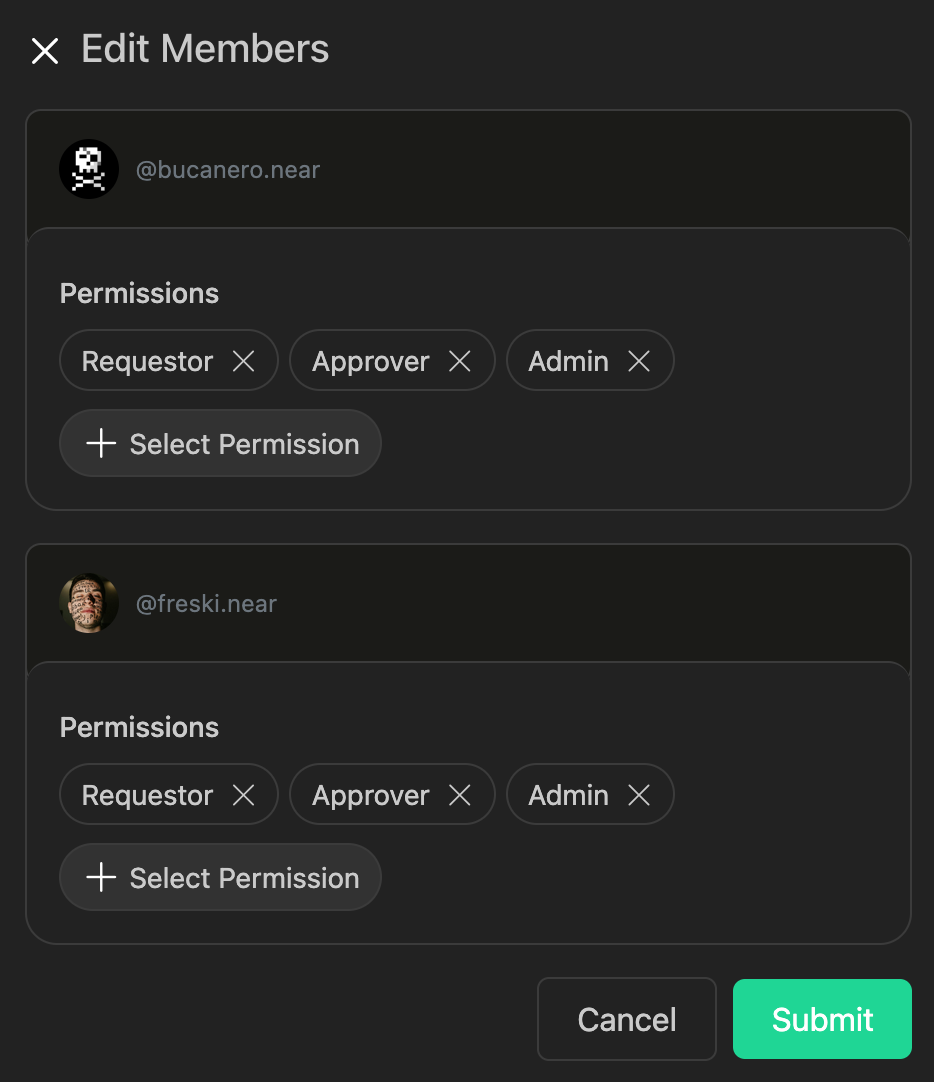
- On the
Edit Memberswindow, modify the permissions as needed. - Click
Submitto confirm the action. - Go to the
Requestspage to approve the request.
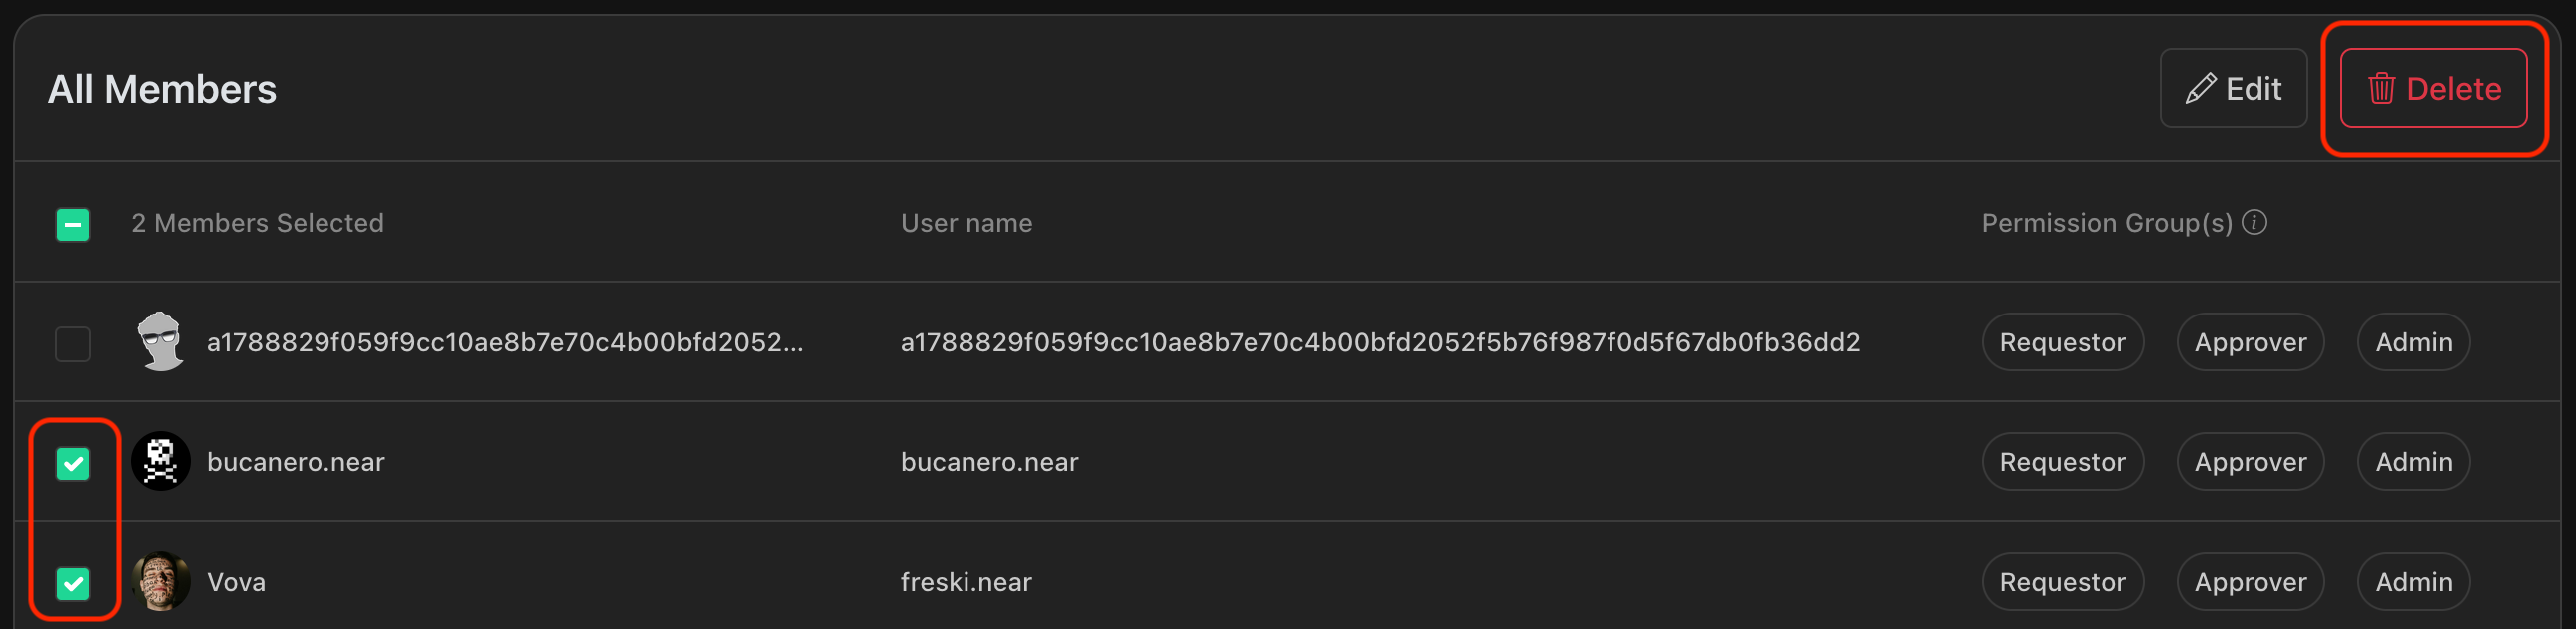
Deleting Members
To delete members from your treasury:
- Navigate to the
Settingspage. - Select the
Memberstab. - Select one or more members by clicking the member's checkbox.
- Click the
Deletebutton. - On the confirmation window, click
Removeto confirm the action. - Go to the
Requestspage to approve the request.
Voting Thresholds
The Voting Thresholds section allows Admins to configure the voting policies for treasury transaction requests and treasury configuration requests.
Setting Thresholds
To set the voting thresholds:
- Navigate to the
Settingspage. - Select the
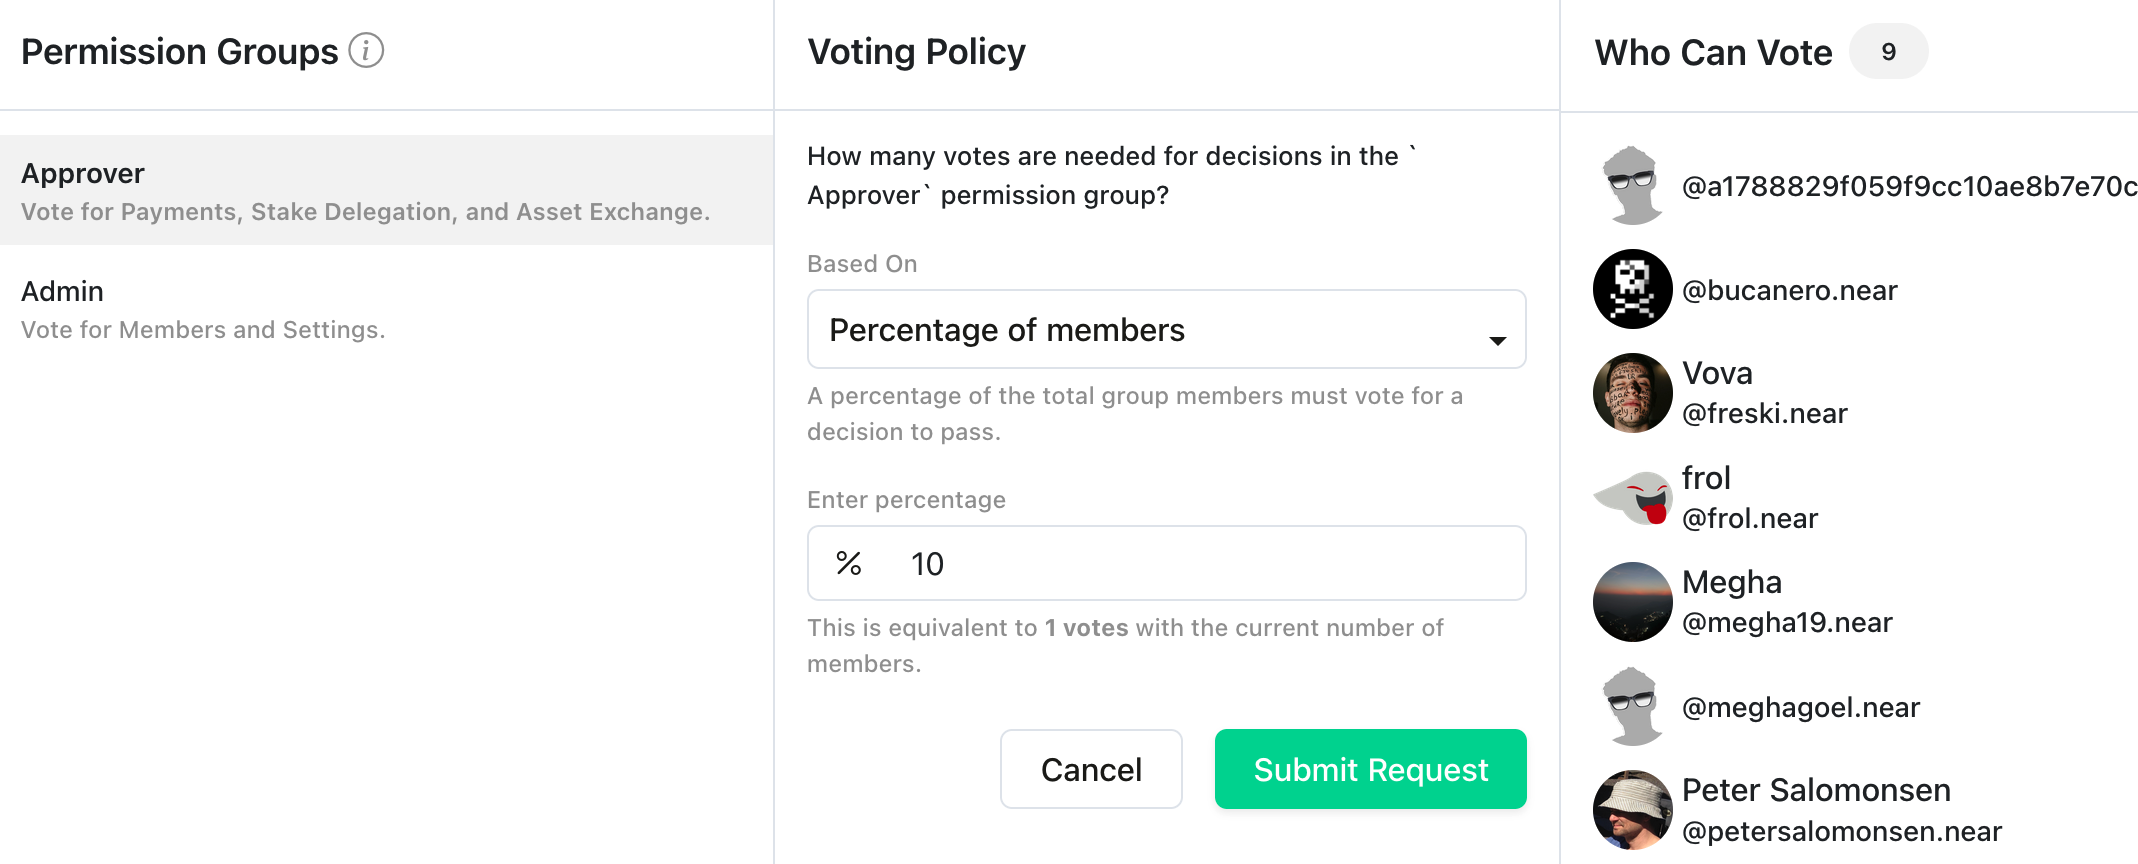
Voting Thresholdstab. - Select the permission group you want to apply the voting threshold to:
Admin: For requests related to change in treasury settings (e.g. managing members, assigning roles, changing voting thresholds, or customizing dashboard appearance).Approver: For requests related to treasury transactions (e.g. payments, staking, asset exchange).
- Under
Voting Policy, select how you want to base the number of votes required for a request to be approved:- Number of votes: A fixed number of votes is required for a decision to pass, regardless of the total number of members. For example, if you select 2 and there are 5 total members, 2 members must vote to pass the request.
- Percentage of members: A percentage of total members is required for a decision to pass. For example, if you select 50% and there are 3 total members, 2 members must vote to pass the request.
- Review the eligible members from the role required to approve this type of request. If you need to change members, go to the
Memberspage to add or remove people from that role. - Click the
Submit Requestbutton and confirm the transactions. - Go to the
Requestspage to approve this request.
Voting Duration
The Voting Duration section allows Admins to set the timeframe during which team members can vote on pending requests. If the voting threshold is met to reach a decision, the request will be approved or rejected based on the voting results. If the voting period ends and there are not enough votes to reach a decision, the request will expire.
To set a voting duration:
- Navigate to the
Settingssection. - Select the
Voting Durationtab. - Set the number of days a proposal stays open for voting.
- Click the
Submit Requestbutton.

Theme & Logo
The Theme & Logo section lets Admins personalize the look of your dashboard. You can upload a custom logo and pick a primary color.
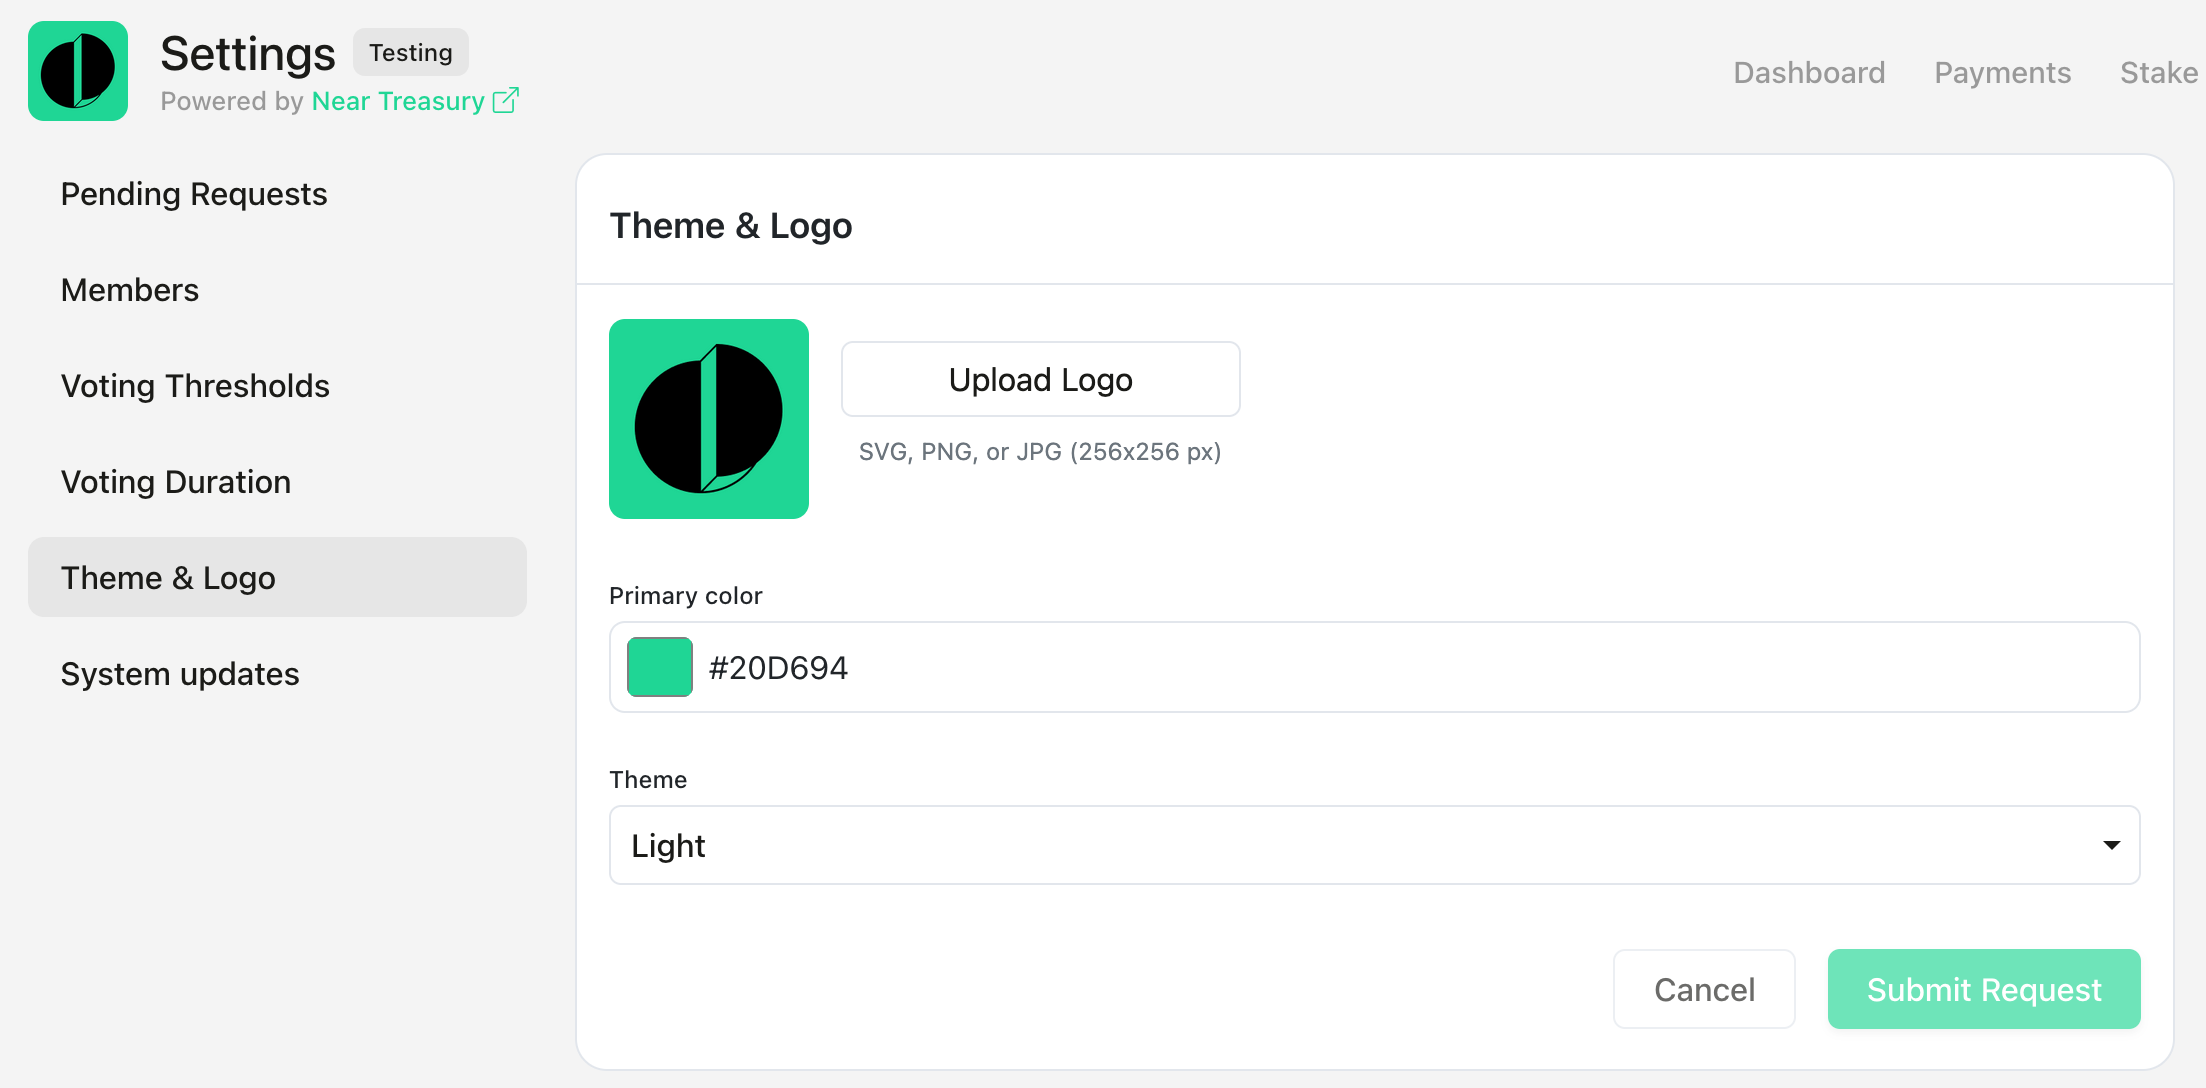
To set your Treasury logo and preferred theme:
- Navigate to the
Settingssection. - Select the
Theme & Logotab. - Upload your logo image. (SVG, PNG, or JPG, 256x256 px)
- Set the Primary color value.
- Set the Theme. (Dark or Light)
- Click the
Submit Requestbutton.
Preferences
The Preferences section allows users to choose their preferred timezone and time format, with standardized date displays across NEAR Treasury.
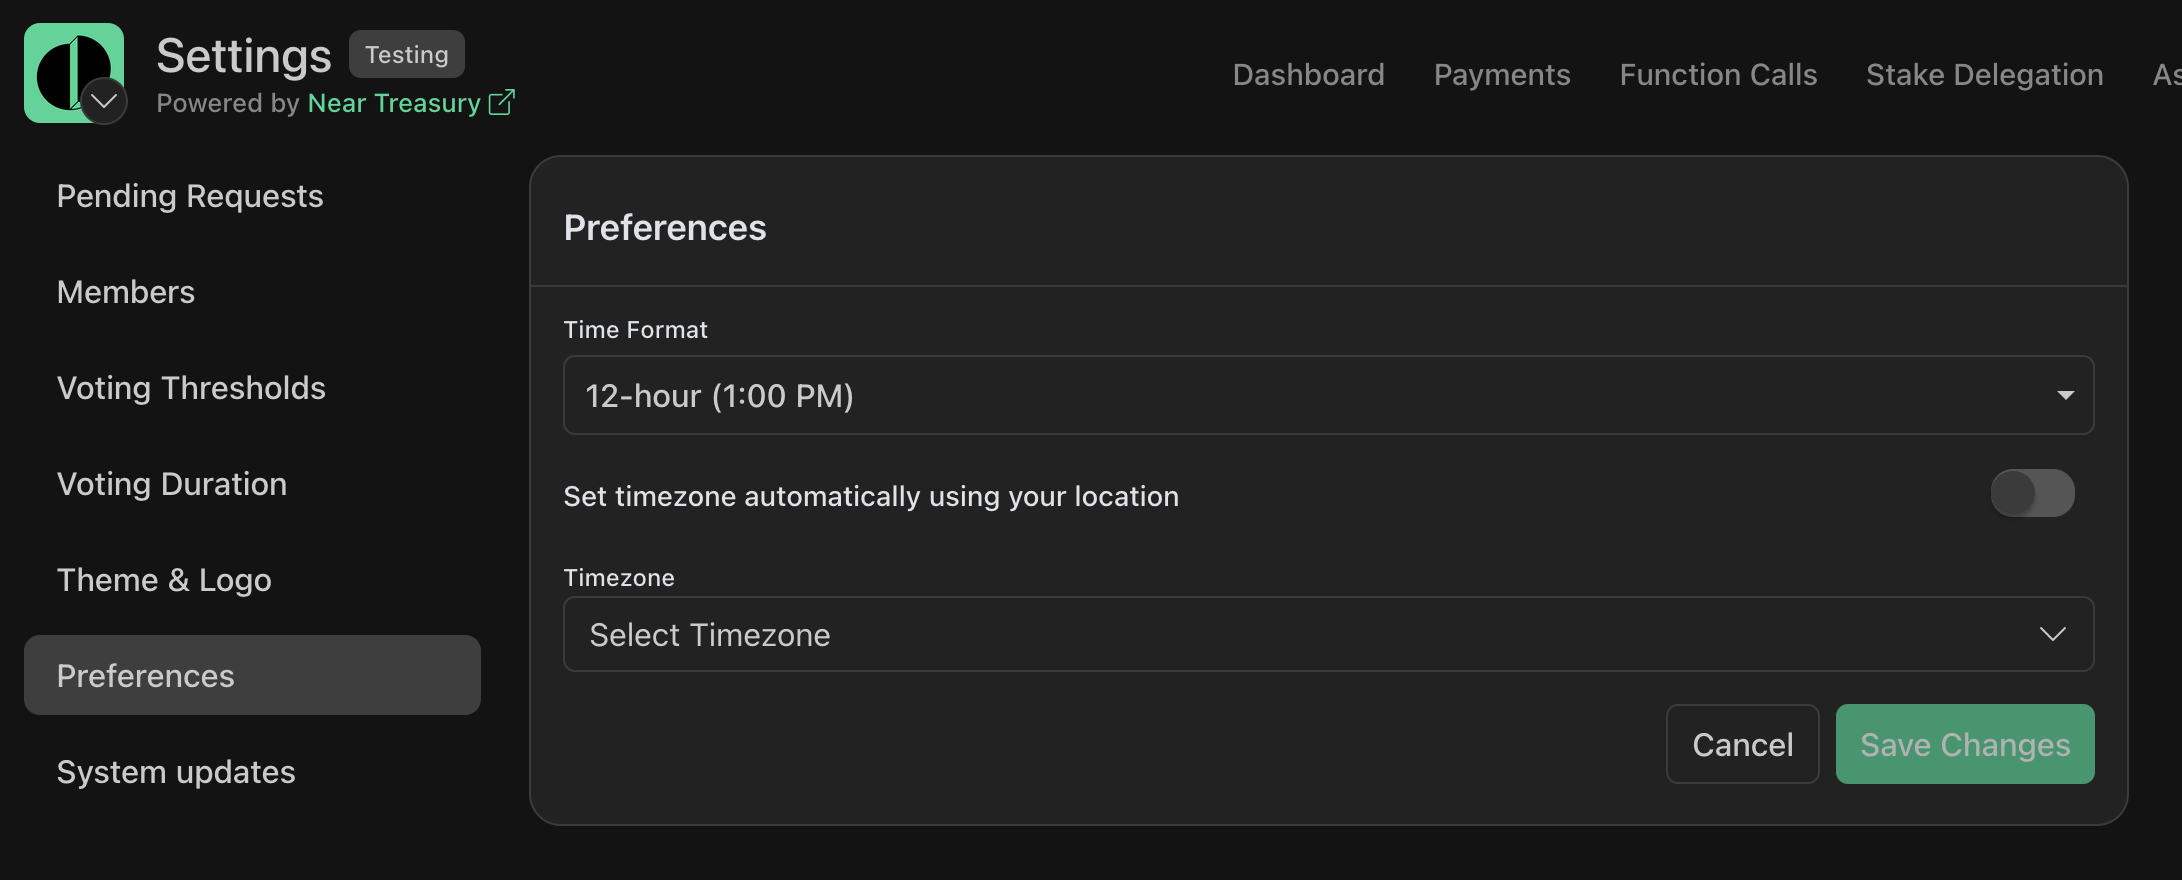
To set your timezone and preferred time format:
- Navigate to the
Settingssection. - Select the
Preferencestab. - Set the Time Format. (12-hour or 24-hour)
- Set the Timezone manually, or use the automatic setting by location.
- Click the
Save Changesbutton.
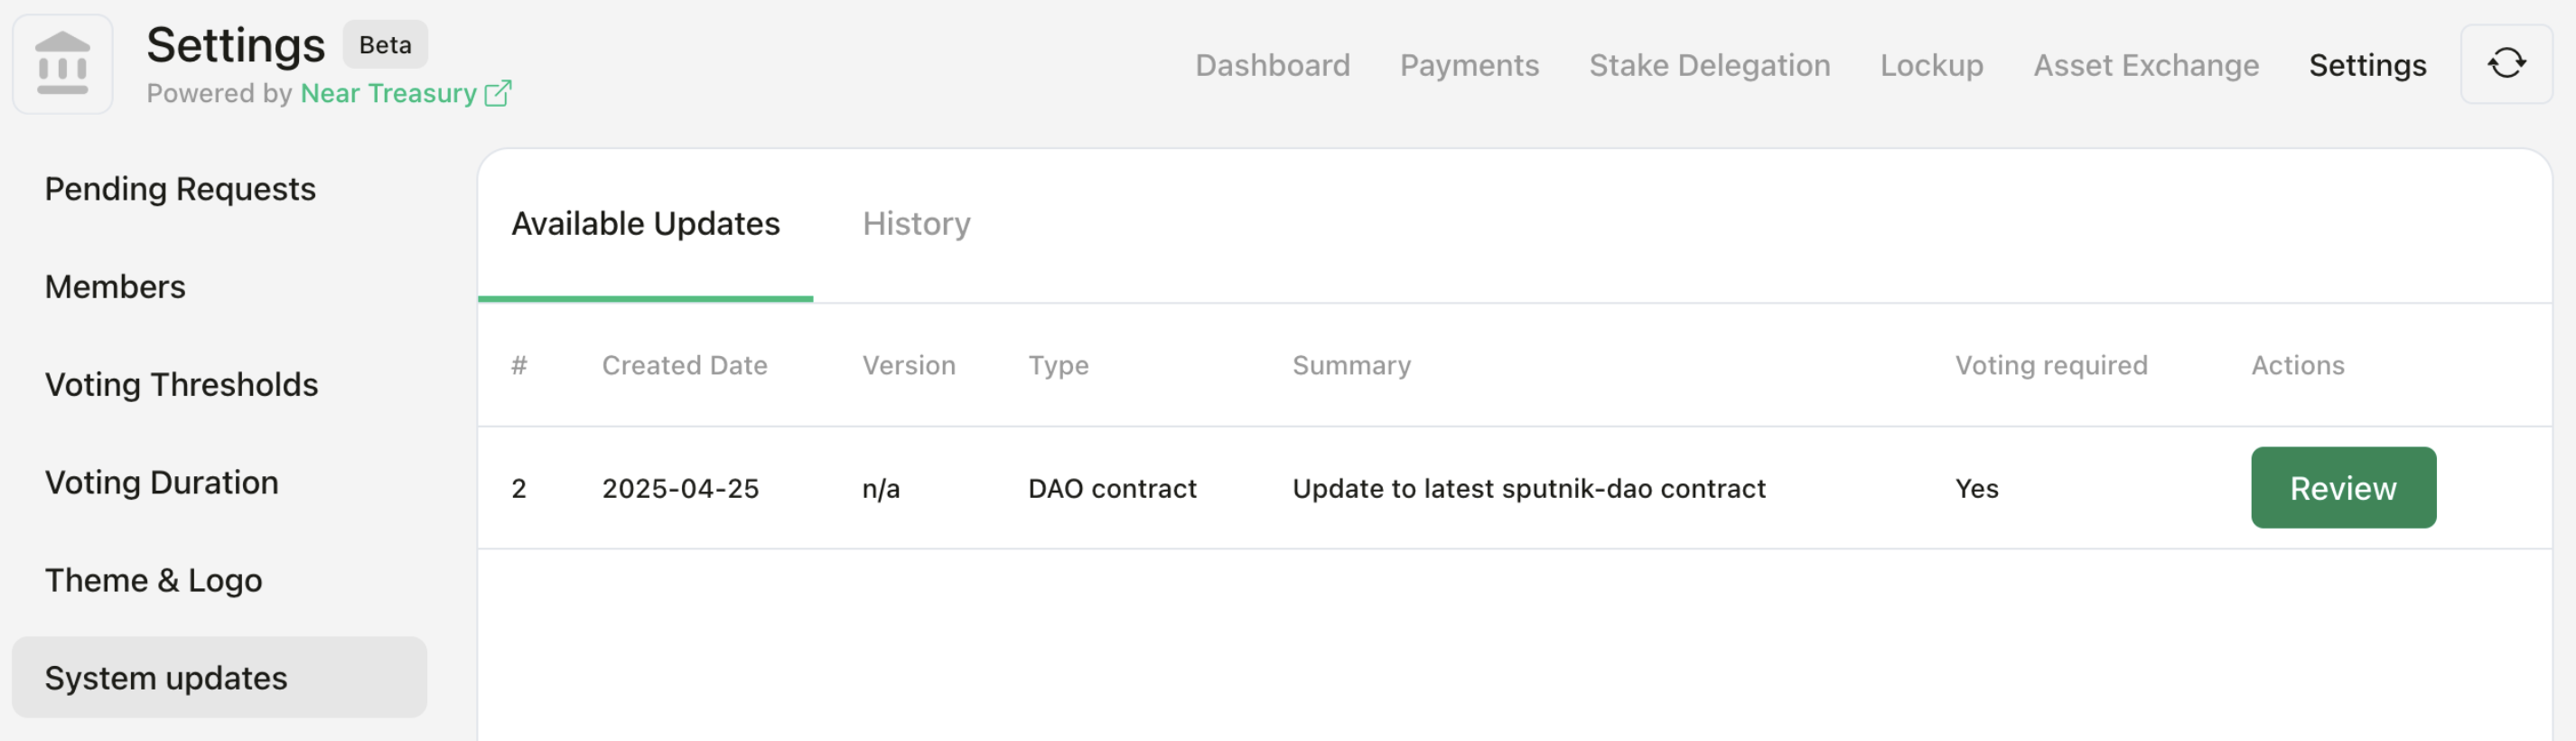
System Updates
The System Update section allows Admins to review, approve, and apply pending updates to their treasury instance.
NEAR Treasury developers push updates such as contract upgrades, policy changes, or instance app widget changes to provide new features, fix bugs, and improve the user experience.
For details on Update Types and the system update mechanism, visit this page.
Reviewing System Updates
All updates must be manually approved or rejected by treasury administrators. To review and vote on pending updates:
- Navigate to the
System updatessection. - View the list of pending updates.
- Review the details of each update.
- Approve or reject the pending update request.
After an Administrator accepts a system policy update, you will see a new request under Pending requests, and Treasury users will need to vote on it.